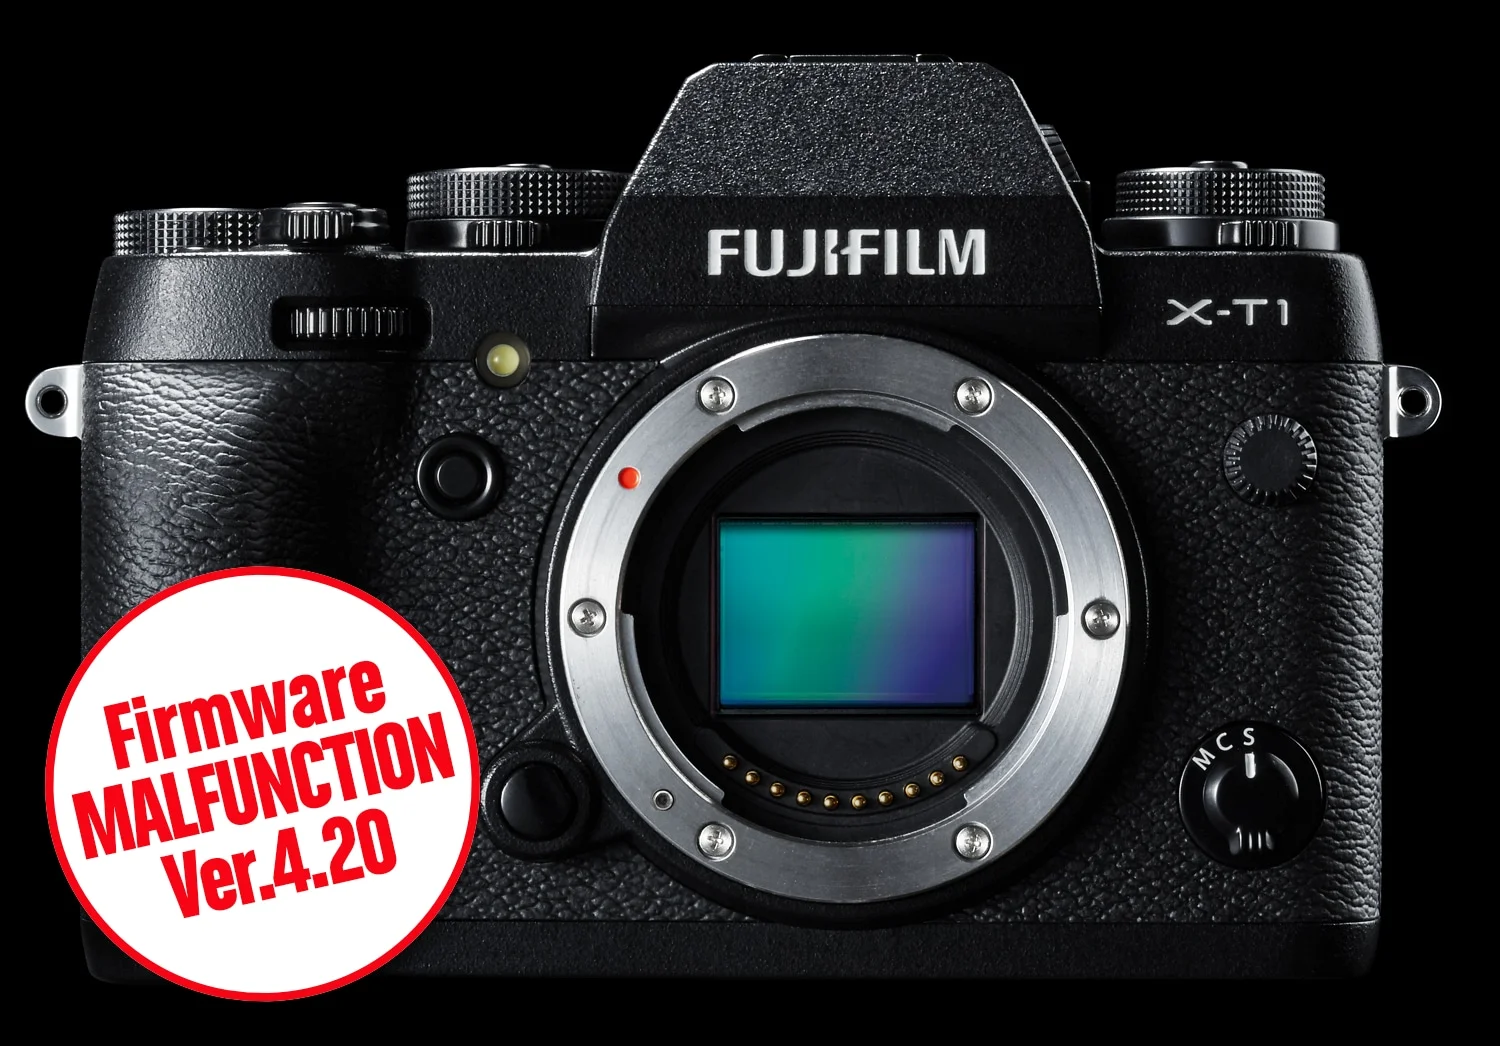
Fujifilm Filter Threads Updated, 2019
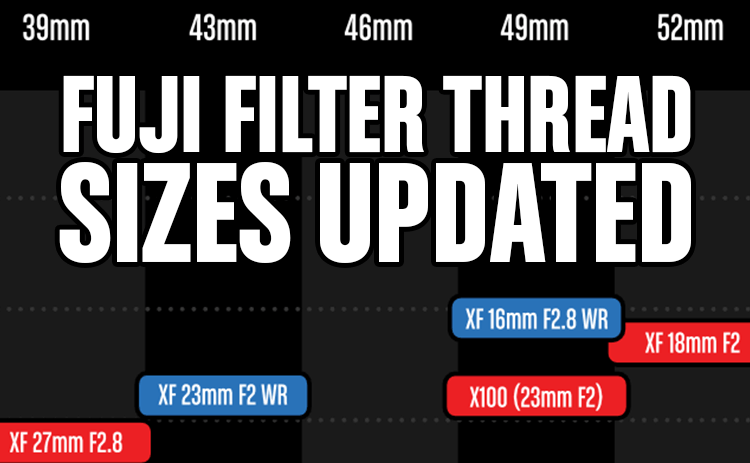
/My Fujifilm Filter Thread Sizes chart and filter buying strategies piece has been updated to include the newly released XF 16mm F2.8 WR, and soon to be released XF 16-80mm F4 OIS WR.
My Fujifilm Filter Thread Sizes chart and filter buying strategies piece has been updated to include the newly released XF 16mm F2.8 WR, and soon to be released XF 16-80mm F4 OIS WR.
This summer has been an adventure. Back in May, we had booked a trip back to the Lake District for the beginning of September. Lakeland is probably our favourite place on earth. The density of glacially carved mountains and lakes, and village cafe and pub splendour is unmatched. After publishing my review of the X-H1, I got to work on my XH1 vs. X-T2 article. It was coming along great, and as a bit of a spoiler, I was excited to finally shoot in The Lakes with Fuji cameras,1 and eager to put the XF 16-55mm F/2.8 WR to work on a stabilized body.
But in early June, one of our 4 cats got sick. Real sick. My wife and I spent 11 weeks exhausting every possible resource and sparing no expense trying to nurse our beloved cat back to health. After multiple opinions, and even more trips to veterinarian services, we decided there was no choice but to cancel our trip, believing we would still be getting Charlie back on his feet.
Things didn’t pan out that way, and sadly, we had to let Charlie go on August 19, 2018.2
…
A few days later, my wife and I talked about what we would do with the vacation time we had already booked off work. No way we could go away, right? But then, what were we going to do otherwise, sit around at home? We decided to look into what was still available, and incredibly, everything we had previously booked still was, so we will be walking the fells of North West England in tribute to Charlie.
Now, with all that time lost, I had to figure out what the hell to bring. It’s been a bit of a scramble the last couple of weeks, but given I leave today I’m settled on my photographic gear selection.
In the grip section of my X-H1 review, I noted that I wasn’t sure whether I wanted to deal with the heft of a gripped X-H1 and an L-plate, or stick to a body-only L-plate. As it turns out, I ended up getting both. The convenience of 3 batteries was too much turn down any time I wanted to use proper support, but I knew a gripped and plated X-H1 would be too big to travel with. Not only is it big and heavy, the size also has an affect on potential carry options.
The last time I was in the Lake District, I packed my Nikon gear in a newly acquired LowePro Photo Sport 200 AW→ after quite a bit of agonizing. I still love this bag. It’s crazy light, super adjustable, and has superb straps, both for your shoulders, and your waist. It is an excellent bag for hiking. Note that this is the first version of the bag. I have not yet tried the LowePro Photo Sport 200 AW II,→ but it looks like they haven’t fixed unbroken things.
Based on the main camera compartment of that bag and my memory, the X-H1 with L-plate is fairly similar in size to the Nikon D700 I had in it before. It fits perfectly, where a gripped body would not.
I always thought when I traveled back to The Lake District, I’d bring something along the lines of my Invincible Landscaper kit. I’ll be bringing the lenses, but I won’t have a body dedicated to each. Instead, my second body will be an X-Pro2 with a weather sealed prime mounted for casual documentary shots.
The X-H1 will mostly have the XF 16-55mm F2.8 WR mounted on it. The section below the main camera compartment in my bag is just large enough to hold an XF 50-140mm F2.8 WR without the tripod collar attached. It’s not ideal, but it seems about as sturdy to have the camera mounted on my tripod as it would be using the rather flex-prone tripod collar.
When I last took in these dramatic landscapes, I went wide with the Nikon 14-24mm f/2.8. This time around, 16mm on APS-C—24mm in 35mm equivalence—is the widest focal length I’ll have with me, and instead of going wider, I’m going much longer. This should open up my shooting possibilities a fair bit, but I’m wondering if I’ll miss the wide end.
Now, if this trip were happening a few months from now, there’s a very good chance I would repeat my focal length choice from last time with the XF 8-16mm F2.8 WR.
The XF 10-24mm F4 OIS sadly wasn’t even on the consideration list because weather sealing. If that lens came with those two magical initials, “W” and “R,” I’d be bringing that lens instead of the XF 16-55mm F2.8 WR along with a set of 72mm filters, rather than 77mm plus a step-up ring.
On my X-Pro2, it should come as no surprise that I’ll have the XF 35mm F2 WR mounted. I’m tossing around the idea of leaving the second body at home, but I really think I would regret it.
I’m pretty shameless about going overboard on the support side of things. Luckily the tripod is one area that has gotten considerably smaller, and lighter. The TVC-23 and BH-40 I had for the full frame DSLR, protruded from my backpack a ridiculous amount. The TQC-14 I have now is much better suited for travel. I’ve thought about moving to the TFC-14 for travel for less weight, even more compactness, and to get closer to the ground, but the Quick Column is extremely convenient for quick (yes, quick) adjustments to height without having to reset 3 tripod legs and my composition. When it comes to getting low to the ground, I have one of Really Right Stuff’s Pocket Pods. And finally, when a tripod with won’t fit or isn’t allowed, I also have their Travel Clamp, which is proved to be remarkably versatile. Finally, I have a mobile phone clamp for capturing time lapses from fell tops and or while shooting long exposures.
I’ve stepped the XF 50-140mm F2.8 WR up to 77mm via a Breakthrough Photography 72-77mm step-up ring so I can use a single set of 77mm filters—also from Breakthrough—for both Red Badge zooms. 3-stop, 6-stop, and 10-stop NDs as well as a Circular Polarizer are all in a tiny Tiffen filter case. They say it’s only for 58mm filters and smaller, but I get 77mm filters in there no problem.
The step-up ring means I need to go hoodless with the XF 50-140mm F2.8 WR, so I won’t be able to use it if the rain goes sideways. It’s a tradeoff I’m willing to make.
One of the main reasons for our trip is to seriously get our hike on. For that, a good pair of boots, waterproof jacket, an accurate set of maps, and a compass are imperative. I’m new to Harvey “Superwalker” maps, but I already like them better than the OS maps I’ve used before. I find them so much clearer. For guided navigation, and to avoid the bother of a working smartphone, we use a Garmin Oregon 600, which has served us very well on trips to Europe in the past. We’ll see how it fairs on the minor roads in the Lakes.
Fujifilm
Really Right Stuff
Breakthrough Photography
Other
See you in a couple weeks.
Of course the XF 50mm F2 WR has a 46mm filter thread. Why would it be 43mm to match the other two F2WR lenses?
My Filter Thread Size piece has been updated to include the XF 50mm F2 WR and XF 80mm F2.8 Macro WR OIS. The former adds yet another filter thread size for a total of 10. The latter slots in with 62mm, extending that diameter’s lead. You win some you lose some, I guess.
I’m giving Fuji the gears a bit up there, but it should be noted it certainly appears as though they start out trying to make their lens filter threads consistent. Their first two primes, the XF 18mm F2 and XF 35mm F1.4 were both 52mm. The first two F2WR lenses? 43mm. And there’s an embarrassment of riches in the 62mm thread size. A for effort.
I’ve revised the entire strategy section of the piece, not just to include the new lenses, but also the availability of new filter sizes from Breakthrough Photography,→ my filter manufacturer of choice.
I’ve updated my Filter Thread comparison chart to include Fuji’s new XF 23mm F2 WR, and revised my filter strategies.
If there’s one thing Fuji doesn’t make easy, it’s keeping the number of filters sizes you need to a minimum. I’ve had a write-up on filter threads in my drafts folder for months now, but Marco Larousse’s rant on episode 3 of the WeShootFuji podcast motivated me to not only get it finished, but to really hone the fancy new chart I had planned, which started out as a basic HTML table.
For a detailed visualization of Fuji’s filter thread diversity, and some strategies on lens kits that optimize for the number of filter sizes needed, check out my latest Extras piece, Fuji Filter Thread Sizes.
And if you’re reading this site, and don’t listen to the WeShootFuji podcast, you should give it a shot. Scott and Marco come from opposite, and outer-most edges of the photography spectrum, so they bring very different insights to all things Fuji from hardcore street, to landscape and nature photography.
I remember buying my first expensive lens—Nikon’s 18-200 super zoom—like it was yesterday. It was hopelessly out of stock just about everywhere, but I stumbled upon one at “Japan Camera” in my once sleepy local mall, and snapped it up. With that lens mounted in my trusty D70s, I was ready for anything. Soon after, I walked into Henry’s1 to inquire about a Circular Polarizer. The sales-guy asked, “For what lens?” As I proudly swung my camera ’round to show off my new baby, the sales-guy gasped and exclaimed “You’re running that thing ‘naked’?!?”
He totally got me. While I knew I could probably find a “protective UV filter” online for less money, I didn’t want anything to happen to my precious before I got it. The sales-guy hammed it up, carefully placing the LCD-side of my camera on a cloth, took out his Rocket Blower, and gingerly puffed what little dust might have found its way on the front element like he was performing heart surgery. Out I walked with a genuine Hoya Super Duper HMC Deluxe filter with about 8,000 coatings and 99.999967% light transmission or whatever.2
I bet a lot of you reading this have similar stories or have seen sales-people in action, preying upon an unsuspecting lens purchaser with a filter to protect their “investment.”3 I heard the “protective UV filter” line at Exposure just this past weekend and couldn’t help but cringe.
I’ve learned a lot since that filter purchase. First of all, that 18-200 was pretty terrible, optically. Secondly, if I want constant “protection” for my lens, I’ll use the hood, which can improve picture quality, rather than degrade it. For those of you who want to keep your lens as compact as possible and hate the idea of sticking a huge hood on the end of your lens, leave it at home, leave the filter locked up behind the counter, and take some care not to smash the front of your lens into tree trucks.4
Now before you pop open a new tab to search for that example of some dude who dropped their expensive lens and was saved by their $100 filter that smashed into bits, I’ve probably already seen it. Yes, accidents can happen. I myself dropped my Nikon 24mm f/1.4 lens on a hard tile floor, denting the front filter ring. That is not an inexpensive lens, I was careless, and it cost me. The repair was somewhere in the neighbourhood of $250. Ouch. It would have been fine if I had the hood on. It might have been fine if I had a filter on, but you know what? I haven’t bought a “filter for protection” for any of lenses I’ve owned since then, and I’ve owned a lot of lenses. There is no doubt that I’ve saved significantly more not buying filters for all those different lenses5 than I’ve spent repairing lenses due to lack of protection.
Of course there are other reasons for attaching a neutral clear filter6 on the front of your lens. Some hate lens caps, preferring a filter in their stead. Others shoot at company parties where cocktail spills are a certainty, not just a slim possibility. Totally understandable, but if you’re not in hazardous conditions and you’re after absolute lens acuity, shed that filter with impunity, never mind dust, get yourself a Rocket Blower, and put your hood on to reduce flare and really protect your lens.
Fuji vs. Fuji is site dedicated to comparing and contrasting Fujifilm X Series mirrorless cameras, FUJINON and X Mount compatible lenses, and related accessories.
The Fuji Views blog contains thoughts and opinions on Fujifilm, the compact mirrorless camera market, and photography in general.
This ad and tracker-free site is made possible by the support its readers. If you enjoy the content, you can help by using any of the links below. Thanks!
This ad and tracker-free website’s biggest source of support by far comes from you, its readers, at no cost. Just use the links below for any of your online shopping, and I’ll receive a small commission. Thanks very much.
All contents © Fuji vs. Fuji, 2013 – 2022